
Hostwinds Tutorials
Search results for:
Table of Contents
How To Manage Products With The Weebly Store
Tags: Weebly Website Builder
The most important part of your Weebly Store is managing the Products and Services you offer your customers. Thankfully, Weebly has an incredibly easy-to-use interface for managing your products on your site. You can create Products, edit them later on, and even put them on Sale. This guide will go through many of the actions you can perform with the products manager in Weebly.
It is important to note that the information provided in this guide is for informational purposes only. The premium features and changes made after the time writing this guide may be different and will be displayed to you in your Weebly account when editing your site through Weebly. Please open a ticket with our Support Team if you do have any questions to get further helps.
Where To Find The Products Manager In Weebly
Step One: Begin by logging into your cPanel and navigating to your Weebly Website Editor.
Step Two: Select Edit next to the Site that you will be managing the Products for

Step Three: From the top, you will want to navigate to the Store tab.

Step Four: On the left, you will find the Products tab available to click on.
Creating A New Product
When on the main Products page in the Weebly Store manager, there will be an option in the upper left to Add Product.

Clicking the Add Product button will show a new page where you can input information about the product.
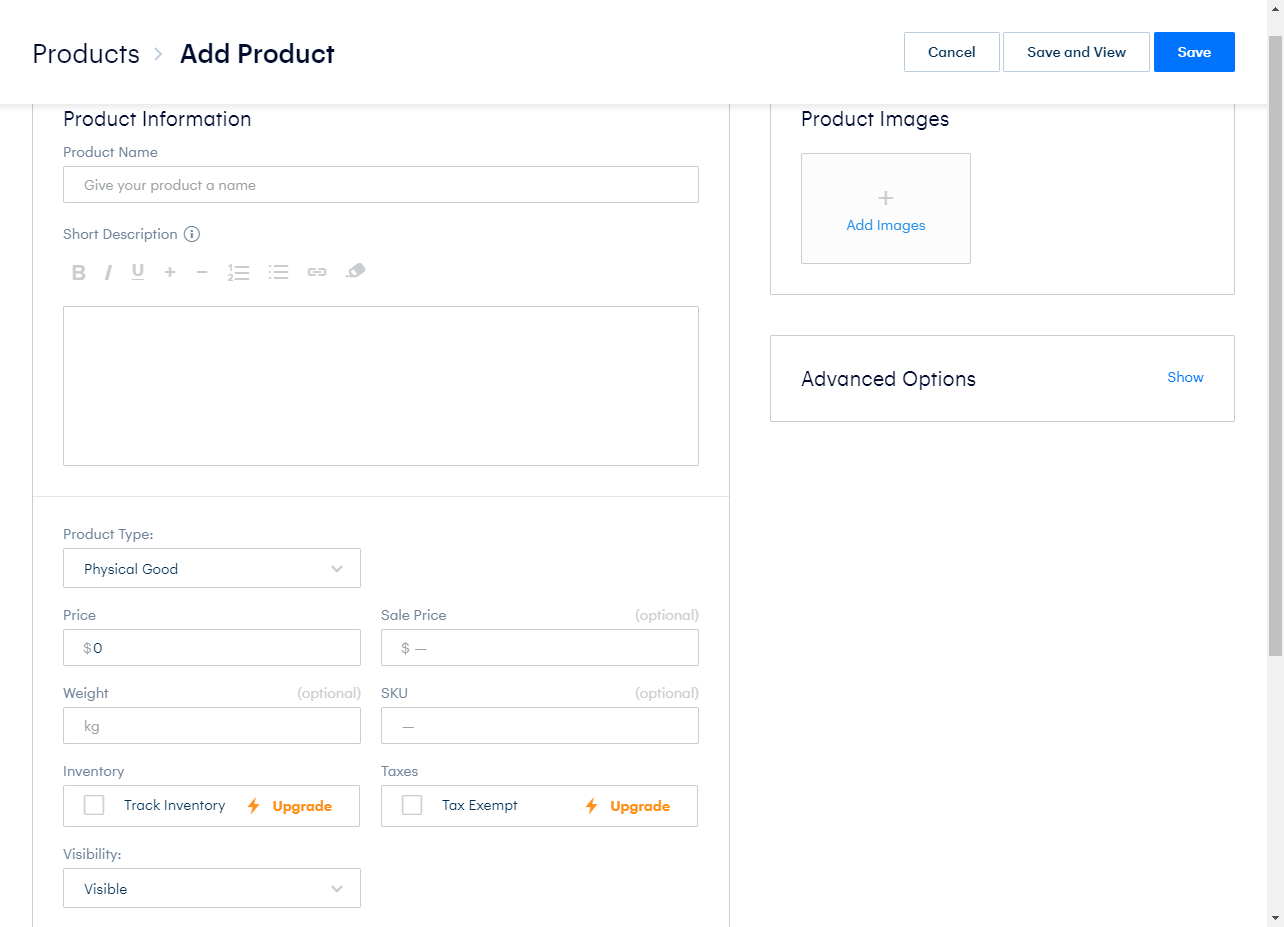
- Product Name – This is the name that your product will identify with your Customers and be shown on the site.
- Short Description – This is a brief description of the product or service. Such as what is included or other information the Customer may be pleased to know.
- Product Type – This is the type of product that you are offering your Customer. The possible options are Physical Goods, Service, and Digital goods. Digital Good requires that the plan be upgraded to a more advanced Weebly license.
- Price – This will be the normal price listed on the product and billed to your Customers.
- Sale Price – If you want to have a sale or decide to lower the price and want it to be more known. The Sale Price allows you to set an alternative price that will overwrite the other written in Pricing. (If On Sale Badge is toggled, it will be more noticeable when set)
- Weight – This is an optional field. However, it is required when setting up Shipping. This can be set in whichever units you would prefer as per your Store settings.
- SKU – This stands for Stock-Keeping Unit. This is a unique code and can be used to track products for inventory purposes. This field is optional.
- Inventory – This allows you to track the inventory of this particular product so that you do not oversell what you have. This also helps to see how in-demand a certain product is.
- Taxes – With this, if you have Taxes set up with your store (Requires Premium Weebly), selecting the Tax Exempt option will make the Product not comply with your existing Tax Rules.
- Visibility – This is the visibility of the product on your site. By default, it will be Visible. However, if set as Hidden, only those who have the link will purchase the Product. If set as Unavailable, no one will be able to purchase the Product from your site.
- Product Images – This allows you to set up and upload your products' images to show your Customers what the Product or Service looks like.
- Advanced Options – This allows you to set SEO-related information about the product page. This is optional, as if left blank, it will use the Product name and description for this.
- Product Rating – This Allows you to see Reviews and ratings that have been written about the product. If this is a new product, there will be no Ratings.
- Categories – This allows you to select Categories that your product goes under. This can be used to separate your products into subtypes. For example, with a Clothing store, you may want to separate Shirts and Pants.

At the bottom of the Add Product page, you can specify multiple product options. This allows easy creation of multiple products that only have a slight difference, such as size or color. Using this will keep them on the same product page, however.
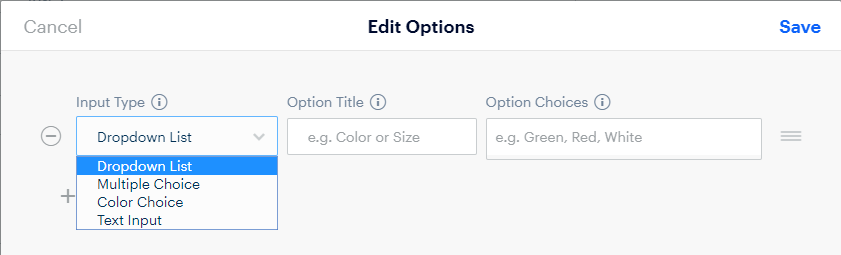
- Input Type – This is how the options will appear on the Product's page. With the Text Input, you can have special requests from your Customers. This can be used, for example, with engraving or adding personal flair to your product.
- Option Title – This is a title shown to the Customer and visible on your end, usually enough to let you know what the options are affecting.
- Option Choices – If selecting an Input Type allows the Customer to select an option, you can input the possible options that they can choose from here, separated by a comma.
When adding any options you want for your product, you can click Save to save the changes. If you are done filling out the Product information, clicking the Blue Save button will save the Product to your Weebly. Clicking the Save and View option will Save the Product then take you to a page that will show what the product page of this particular product will appear like to your Customers.
Editing A Product
On the main Products page, if you click on any of the Products listed, it will take you to a similar page, if not the same, as the page for Adding a New Product. This will allow you to change any information and pricing about that particular product.
Searching For Products
On the main Products page, you will notice a search bar towards the top. This will allow you to search through your products based on their Name. You can use the Filter dropdown on the right of the search bar to choose which types of products you are searching between. This can be Physical Goods, Digital Goods, or Services.
Product Settings
With Weebly, you can set certain Badges or unique displays of status on your products Shown to your Customers. This can notify your Customers of special deals or when stock is getting low, which can influence their decisions on when to purchase your product.
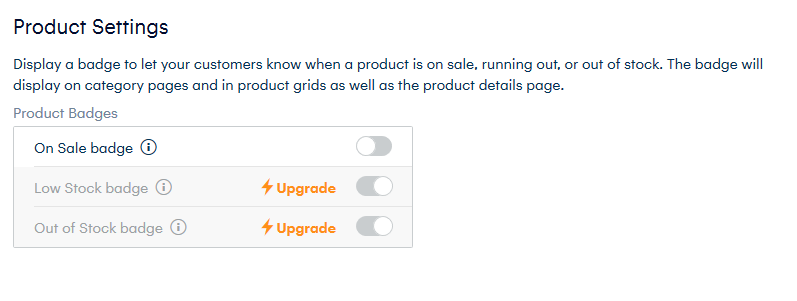
- On Sale – Will Show a slash through the normal price, with the new Sale price listed if selected.
- Low Stock – Will show that a product is low in stock if the inventory is less than 5.
- Out of Stock – Will Show if a product inventory quantity reaches 0.
The Out of Stock and Low Stock badges will only be available if you have a premium version of Weebly.
Adding A Category
On the left in the Store menu, underneath the Products, there will be a Categories section. Here you will be able to Edit, Add and Manage your Categories. In the Upper Right of this page, there will be an option to Add Category. This will show the prompts for adding a New Category to your Weebly's Store.
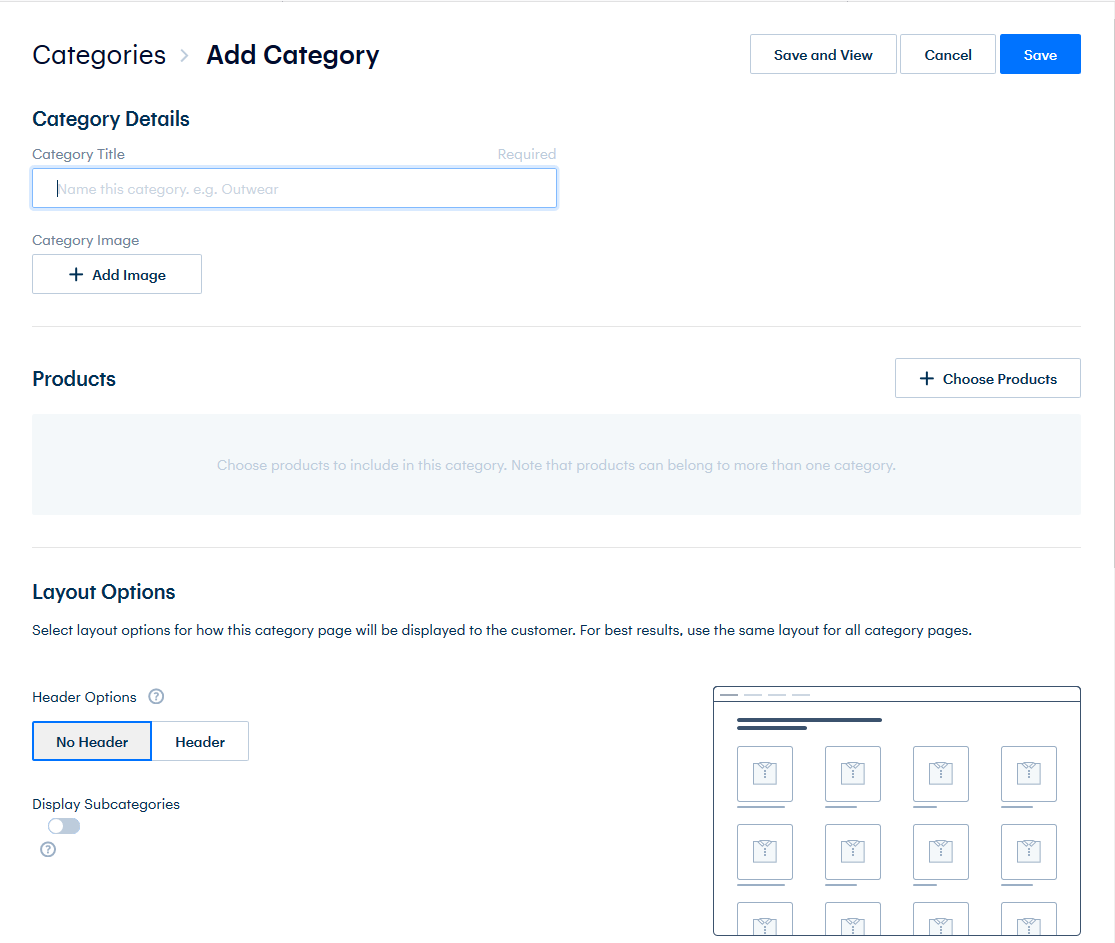
- Category Title – This is the name that all the Products under the Category will relate to.
- Category Image – If there is an image representing all of your products, you can upload that image and have it show for the Category Page.
- Products – This will allow you to assign existing products easily to the Category. Additionally, you can set a Products category when it is being created or edited.
- Layout Options – Here, you can change whether the Header will show on your Category pages and display the subcategories.
- Search Engine Optimization – Not required to be filled out. However, these can be used to customize the SEO of your Category page. If left blank, it will use the defaults that you entered above regarding the Category Information.
When Done, you can click Save in the upper right to save the category.
Editing A Category
When you want to edit a Category, it is a similar process to adding a category. You can select the category you want from the list on the Main Categories page. It will take you to the page where you will edit all the information about that Category, including products.
Gift Cards
With your Weebly store, you will have the ability to Enable Gift Cards (which require Premium Weebly) to be used in your online store. When enabled, these can be purchased similarly to the Other products being sold in your Weebly Store.
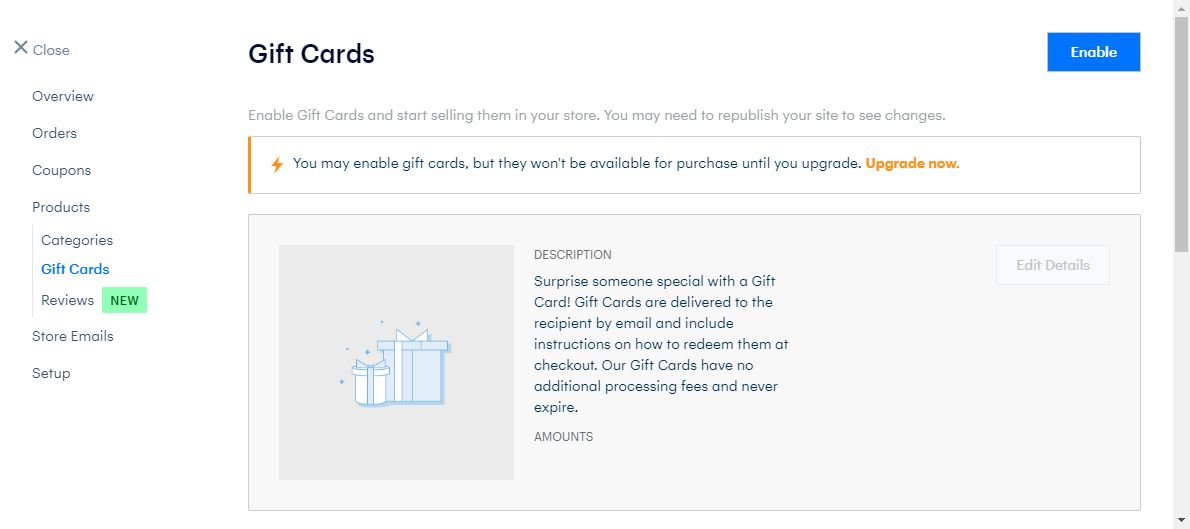
Selecting the Edit Details button will allow you to customize and make the options more specific to your store, including the pricing increments that you allow Gift Cards to be purchased, as well as the Description that goes along with them.
Add Gift Cards to Your Store
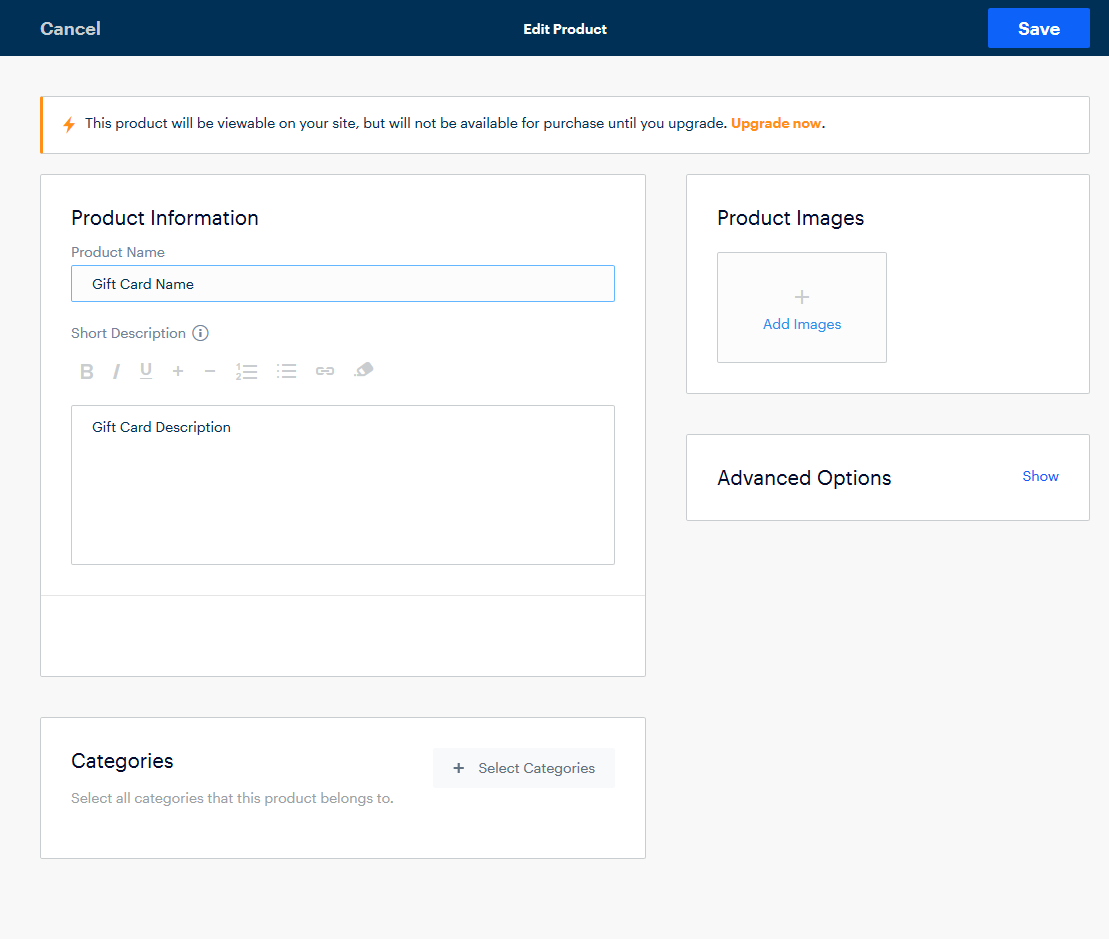
- Product Name – This will be what you want to name the Gift card. You can set this to be anything you want.
- Short Description – This can be a simple description that the Gift Card recipient will receive when it is purchased. You can make this a tagline to purchase products in your Store.
- Categories – As the Gift Card is just another Product, it can be added to a Category if needed.
- Product Images – Images that show what can be done with the Gift Card. These are not required. However, it is recommended to prevent the default image from showing.
- Advanced Options – allows you to customize the SEO of the Gift Card's Product page.
- Product Rating – This is how your Gift Card has been rated if you have enabled Reviews.
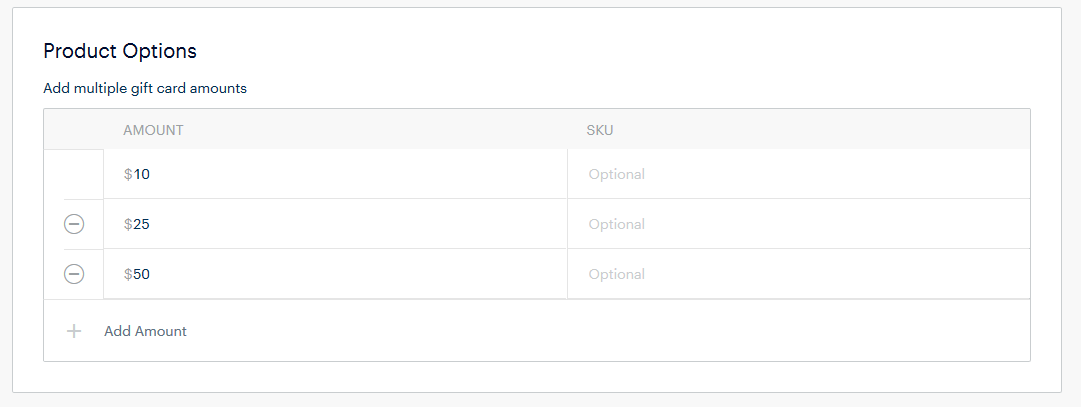
At the bottom of the Edit page for the Gift Cards, you will be able to set the Amounts, and if needed, the SKU of each gift card type.
When finished, clicking the Save button in the upper right will save the changes made to the Gift Cards.
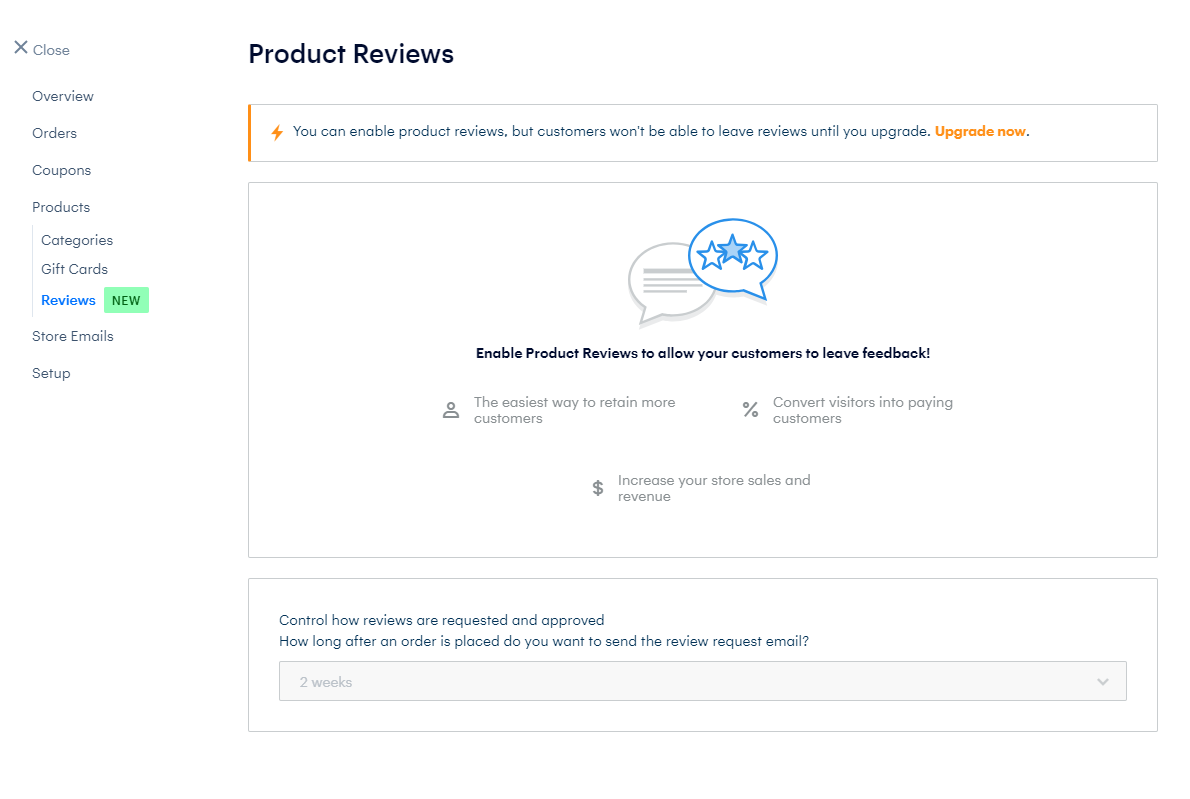
Product Reviews
With the Weebly store, if you have upgraded to a more premium version, you will utilize the Product Reviews feature. This allows your Customers to leave reviews on your products that can provide you with powerful feedback. Under Review Options, there is also a dropdown for how long after a customer orders a product that you email them asking for a review. This email can be modified in the Store Emails tab.
If you should have any questions or would like assistance, please contact us through Live Chat or by submitting a ticket with our Technical Support team.
Written by Hostwinds Team / August 1, 2018