
Hostwinds Tutorials
Search results for:
Table of Contents
How To Setup Custom Client Fields In WHMCS
WHMCS provides support for creating your own custom fields for input and display on a client's profile. This article goes over the Custom Client Fields options and how to add a custom field.
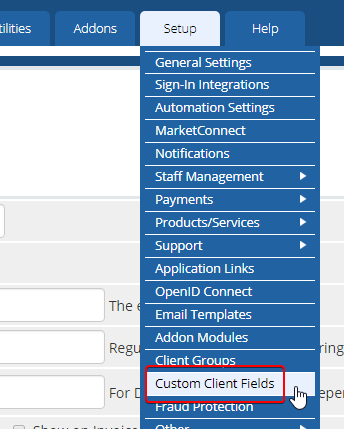
To access the Custom Client Fields options, navigate to Setup -> Custom Client Fields.
This page will list all existing Custom Client Fields on the system, and there is a form at the bottom of the page to add a new one.

Adding a Custom Client Field
To add a new Custom Client Field, fill out the form at the bottom of the page and click Save Changes.
- Field Name: The name of the field.
- Display Order: Position in which the field will display in the list of all Custom Client Fields.
- Field Type: Specifies the type of input field.
- Description: Description of the field displayed to the user.
- Validation: Specifies regular expression string for input validation.
- Select Options: Specifies dropdown list items, separated by commas (,). Only applicable if Field Type is set to DropDown.
- Admin Only: Specifies if this field is for admin use only.
- Required Field: Specifies if this field is required.
- Show on Order Form: Specifies whether or not to show this field on order forms.
- Show on Invoice: Specifies whether or not to show this field on invoices.
Modifying a Custom Client Field
To edit an existing Custom Client Field, make your changes to the field you want to change in the list of existing fields and click Save Changes.
Deleting a Custom Client Field
To delete an existing Custom Client Field, click the Delete Field button on the field you want to remove and click OK on the confirmation popup.
Written by Hostwinds Team / September 20, 2018