
Hostwinds Tutorials
Search results for:
Table of Contents
Restrict FTP Access By IP Address – Windows Server (5 Steps)
Restricting FTP Access to your Windows Server by an IP Address may be done and is suggested to improve your server security.
How To Set IP Restrictions To Access Your FTP Site.
Step 1: Open Internet Information Services (IIS) Manager
- If you are using Windows Server 2012 or Windows Server 2012 R2:
- On the taskbar, click Server Manager, click Tools and then click Internet Information Services (IIS) Manager.
- If you are using Windows 8 or Windows 8.1:
- Hold down the Windows key, press the letter X, and then click Control Panel.
- Click Administrative Tools, and then double-click Internet Information Services (IIS) Manager.
- If you are using Windows Server 2008 or Windows Server 2008 R2:
- On the taskbar, click Start, point to Administrative Tools, and then click Internet Information Services (IIS) Manager.
- If you are using Windows Vista or Windows 7:
- On the taskbar, click Start, and then click Control Panel.
- Double-click Administrative Tools, and then double-click Internet Information Services (IIS) Manager.
Step Two: In the Connections pane, expand the server name, expand Sites, and then FTP site or URL for which you want to add IP restrictions.
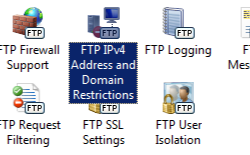
Step Three: In the Home pane, double-click the FTP IPv4 Address and Domain Restrictions feature.
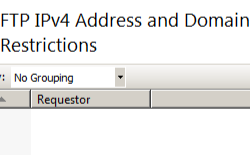
Step Four: In the FTP IPv4 Address and Domain Restrictions feature, click Add Allow Entry… or Add Deny Entry… in the Actions pane.
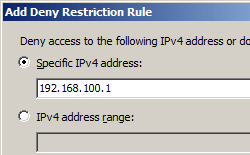
Step Five: Enter the IP address you wish to allow or deny, then click OK.
How to edit the IP restrictions feature settings for an FTP site
Step 1: Open Internet Information Services (IIS) Manager:
- If you are using Windows Server 2012 or Windows Server 2012 R2:
- On the taskbar, click Server Manager, click Tools and then click Internet Information Services (IIS) Manager.
- If you are using Windows 8 or Windows 8.1:
- Hold down the Windows key, press the letter X, and then click Control Panel.
- Click Administrative Tools, and then double-click Internet Information Services (IIS) Manager.
- If you are using Windows Server 2008 or Windows Server 2008 R2:
- On the taskbar, click Start, point to Administrative Tools, and then click Internet Information Services (IIS) Manager.
- If you are using Windows Vista or Windows 7:
- On the taskbar, click Start, and then click Control Panel.
- Double-click Administrative Tools, and then double-click Internet Information Services (IIS) Manager.
Step Two: In the Connections pane, expand the server name, expand Sites, and then FTP site or URL for which you want to configure IP restrictions.
Step Three: In the Home pane, double-click the FTP IPv4 Address and Domain Restrictions feature.

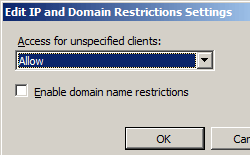
Step Four: In the FTP IPv4 Address and Domain Restrictions feature, click Edit Feature Settings… in the Actions pane.

Step Five: Choose the default access behavior for unspecified clients, specify whether to enable restrictions by domain name and then click OK.
Written by Michael Brower / January 30, 2020